
Installing wishbone beads is an easy process when you know the simple techniques demonstrated here
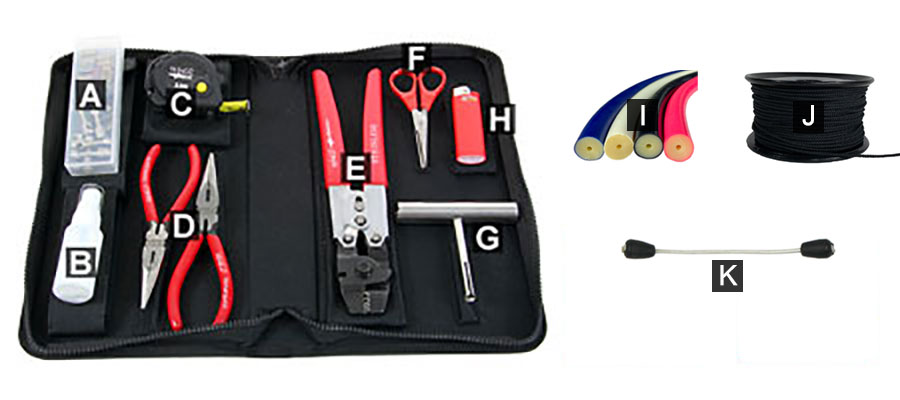
In your MAKO Spearguns Attack Pack Tool Kit you will need:
- B) Food grade silicone
- D) Pliers
- F) Scissors
- H) Lighter
- G) Wishbone insertion tool (with flared end)
You will also need:
NOTE: Bridle wishbones are to be used only with shafts with "Sharkfin Tabs" or shafts with "rounded notches". "Unrounded notched shafts" will cut through bridle wishbones.
WARNING: Some spearos will file their notches to accept bridle wishbones, however this process weakens an already weaker shaft and increases the chance of a broken shaft.
MAKO Spearguns offers only high quality shafts with "Sharkfin Tabs" that are almost 50% stronger than notched spears.

Pin Tabbed Shafts

Sharkfin Tabbed Shafts

Smooth Notch Shafts

Sharp Notch Shafts
STEP 1
Spray beads with food grade silicone for ease of entry and use 'Flared end MAKO Wishbone Insertion Tool" to insert beads into tubing.


MAKO tool with "Flared End" is used for beaded wishbones. The flared portion holds the bead secure during insertion into the tubing.


MAKO tool with "Straight" end is used for knotted end wishbones. The straight end tool holds the knot secure during insertion into the tubing and allows the knot to stay inside the tubing upon removal.
STEP 2
Use band tying line to tie a constrictor knot. Line up constrictor knot and use pliers to tighten know. YOU MUST PULL HARD! Then turn tubing over and tie a 2nd constrictor know on the back side of the tubing.


STEP 3
After tying the second constrictor knot on the opposite side of where the first constrictor knot was tied, remove excess material and burn ends to prevent fraying


